Monday, February 6, 2012

Mmm Mmm Meatloaf!

I think I love meatloaf.

Yeah, I never thought I'd ever say that sentence! I mean, come on, meatloaf? Well, with the
help of Kraft Canada and a little from myself I think I've perfected it....just saying.


I used Kraft's Favorite Meatloaf Recipe but I altered it a little. I love the idea of frying onions in the Zesty Italian dressing but in my own I also fried it with garlic to give it a little more flavor in the dish.
Another thing I did differently is I added shredded cheese throughout. And when I say throughout, I mean I mixed it with the ground beef, then put half of the ground beef mixture in the pan added a handful of shredded cheddar cheese and then topped it with the remainder of the ground beef mixture....and then topped it with cheese when it was almost ready to come out of the oven. Yeah, we like cheese that much lol
Sometimes I like to add bacon, you can either do this by cooking a few slices, chopping them up and adding them to the ground beef mixture or adding crumbled pieces on top at the end when you add the cheese or laying the bacon on top of the loaf and cooking it that way.
Meatloaf doesn't have to be boring. You can alter your favorite recipe however you want. I once came across a buffalo chicken meatloaf but never did try it as I am the only one in this house who appreciate's Franks Red Hot Sauce....that's probably where I found the recipe too!
Let me know what you do to make your meatloaf a little less ordinary or any dish for that matter. I for one could always use a little dinner inspiration!
Hope you enjoy my recipe!

My Favorite Meatloaf

1 onion
2 cloves of garlic
1/2 cup Zesty Italian Dressing
1 lb of Ground Beef
1 box Stovetop Stuffing
2 eggs
3/4 Cup Water
3/4 Cup Ketchup
Shredded Cheddar Cheese

Fry onion and garlic in dressing for 5 minutes or until softened.


Mix onion mixture with ground beef, stuffing, eggs, water 1/2 cup of the ketchup and shredded
cheese.
 Aww! Look, I made a ketchup heart!
Put in a loaf pan and cover with remaining ketchup.

Bake in pan for 1 hour at 350F.

I forgot to take a picture of the finished product but I'm sure you get the idea!
Pin It!

Wednesday, February 1, 2012

Happy Birthday To Me!

So I love to help my family celebrate their birthdays. I plan parties, email radio stations, buy gifts and make cakes like any other Mom. But when it comes to my birthday I don't usually get cake unless my Mom does. So I decided that this year I was going to make my own.

I'm not going to lie, it's mostly because I saw it on Pinterest a week before my birthday and thought, why not?!

So here it is, the super delicious and even easier recipe I adapted from Mommy's Kitchen I just had to try:

Ice Cream Sandwich Cake:

You need:
About 10 Ice Cream Sandwiches
Hot Fudge Ice Cream Topping
Whipped Topping (thawed)
1 Cup Crushed Candy (Oreos, Malteasers, Smarties etc.) or A Drizzle of Your Favorite Syrup (I used Rolo Flavoured Quick)

Line a 9x13 Pan with Ice Cream Sandwiches (Cut to fit if you have to, I used 9 1/2)
Cover with fudge topping.
Cover with thawed whipped topping.
Sprinkle or drizzle with candy or syrup.
Cover and freeze for 5-7 hours.
That's it!
Easy peasy lemon squeezy!


Layer the bottom of a 9x13 inch pan with ice cream sandwiches (super hard, right?)

Top with fudge ice cream topping.

Add a layer of cool whip.

Top with your choice of topping, cover and freeze for 5-7 hours!
Pin It!

Tuesday, January 31, 2012

Super Easy Cookies

I live in a small town. And by a small town, I mean one with no grocery store. All we have is a gas station that sells everything you need, but of course it's all over priced. You may ask what this has to do with anything and I will tell you.

I want to make cookies and I have no flour. I've already been to the grocery store in another nearby town and forgot to get any. I have four kids (only three are mine) and one is napping. No trip to the gas station for me!

What's a girl to do? I'll tell you! Bake cookies! This is no big secret I'm sure and it kind of sucks that I can't make these cookies for my daughter's lunches as they include peanut butter but these three ingredient cookies take no time to whip up. I added some chocolate chips on top for extra chocolatey goodness and I got this recipe from the back of the Kraft Peanut Butter container. In case you haven't seen it or tried it, here is my recipe adapted from Kraft's Super Easy Peanut Butter Cookies recipe:

Peanut Butter Cookies

1 Cup Peanut Butter
1/2 Cup Sugar
1 Egg
Handful of Chocolate Chips, M&Ms, Rolos or whatever you like

Mix peanut butter and sugar and egg.
Roll into balls, flatten and top with chocolate chips. I used four chocolate chips per cookie but
go crazy, add 5 or 6! :)
Bake at 325F for 15 minutes. Makes 12 cookies.

Enjoy and let me know how yours turn out or what you did differently?

Alison xo
Pin It!

Thursday, August 4, 2011

Summer Time

Ah summer! How I love you so! Another beautiful day in Alberta and I'm loving it. Despite the weather I am missing my 7 year old little girl dearly! She's in Ontario with her Grandparents for another week and a half! I am certainly not lacking things to do around here but no matter how busy I get I never stop thinking about her! Tomorrow I drop my husband off in Calgary so he can go join her. Me and the boys are sticking around here as I couldn't imagine how fun it would be to fly with two kids under two....yep not going happen! That's okay though, I get my vacation in a couple of weeks and get to go to BC! Yay!
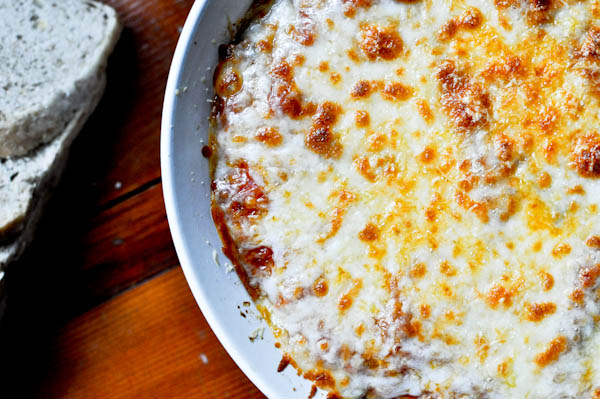
Well, though it's not quite baking weather I have a few baking recipes to share. If anything, save them for a rainy day...or do what I do and just bake it anyway! I'm a sucker for punishment! I am cooking Baked Parmesan Spaghetti from How Sweet It Is a great blog all about FOOD! And doesn't it look delicious?! I'd show you mine but it is lacking cheese at the moment and I am waiting for my husband to deliver it!
And if you're looking for a scrumptious snack for later...or now why not enjoy a Rolo Cookie. Why? Well if the fact that it's called a Rolo Cookie didn't already leave your mouth watering, the fact that all that the recipe calls for is cake mix, oil, eggs and Rolos should do the trick! I made these the other day and they are super yummy, a nice soft cookie with a Rolo in the middle.
Well, my children are still sound asleep. I should probably go sweep the floor or something useful like that! Happy Thursday everyone!
Pin It!

Wednesday, July 20, 2011

Something New...

So, I thought I'd try a different approach to my blogging. Since my obsession with Pinterest has flourish in the past month I've been inspired to make and create a whole lot of goodies for my family and friends. I love finding new and creative ideas, to think outside of the box and make being a stay at home Mom look cool! So to begin my newest venture in the blogging world I will start by sharing a dangerously wonderful recipe with you: S'mores Cookie Bars. I found this recipe on Pinterest which led me to Lovin the Oven's amazing S'more Cookie Bar recipe I warn you now, these are AMAZING. I pretty much ate the whole first (and second) batch that I made. Try them and let me know how they turned out! Enjoy!

 These are how my turned out...and they taste even better than they look!

S'more Cookie Bars
1/2 cup butter, room temperature
1/4 cup brown sugar
1/2 cup sugar
1 large egg
1 tsp vanilla extract
1 1/3 cups all purpose flour
3/4 cup graham cracker crumbs
1 tsp baking powder
1/4 tsp salt
2 king-sized milk chocolate bars (e.g. Hershey’s) *I used Lindt Chocolate Bars*
1 1/2 cups marshmallow creme/fluff (find them with the ice cream toppings in the grocery store)

Preheat oven to 350°F. Grease an 8-inch square baking pan. In a large bowl, cream together butter and sugar until light. Beat in egg and vanilla. In a small bowl, whisk together flour, graham cracker crumbs, baking powder and salt. Add to butter mixture and mix at a low speed until combined.
Divide dough in half and press half of dough into an even layer on the bottom of the prepared pan. Place chocolate bars over dough. 2 king-sized chocolate bars should fit perfectly side by side, but break the chocolate to get it to fit in a single layer no more than 1/4 inch thick. Spread chocolate with marshmallow creme or fluff. Place remaining dough in a single layer on top of the fluff (most easily achieved by flattening the dough into small shingles and laying them together) Bake for 30 to 35 minutes, until lightly browned. Cool completely before cutting into bars.
Pin It!

Saturday, July 16, 2011

Noah

I am back! With the birth of my third addition, Noah Ryder, to this wonderful family of mine already over 7 weeks behind me, I am starting to think I should keep better track of my life. Time goes by too fast (cliche I know, but it's so true!)
Things have been crazy...and when I say crazy I mean YIKES! Having a third child has seemed to challenge me more than I had expected. It's taking time and with lots of help from supportive family and friends, my sanity has remained intact. So a big thank you to all those who have went out of their way to make our life a little easier. Don't get me wrong, I love the craziness and chaos that is our life. I love to squeals of joy and laughter that comes from my children. The smiles, the hugs, the kisses. My kids are amazing and I am blessed to have them. Mikhayla and Tanner are two of the proudest big brother and sisters I know! They love their little brother and have plenty love to share with him. Now if only I could bottle up their energy and use it, I'd have it made!
On that note, I should probably sneak off to bed while the going is good! Cheers! xo

Pin It!

Thursday, October 21, 2010

And Then There Were THREE!!!!!

Well, it's officially official. Someone decided we were not done having children and we are blessed to be preggers with baby number three!! Yikes!
Should be interesting having two in diapers that's for sure!
At the moment, I am not sure how far along I am. On November 4th, I go in for an ultrasound to find out just that. We figure late June, early July. Thankfully this time, I won't be pregnant during the summer!! Yes!!!
So that's my big news!! Until then, I must figure out a lot of things! Such as rooms for instance. We had thought about creating a room in the basement for Mikhayla at the bottom of the stairs so she isn't so far away, but that idea was put to rest by Mikhayla. Apparently she's cool with sharing her room...yeah...right!! Back to the drawing board we go!!
Pin It!